
Google Sites Images
Google Sites Images: Enhancing Website Design
Introduction to Google Sites
Google Sites is a web-based platform provided by Google that enables users to create and design their own websites without needing to know coding. It is known for its simplicity, user-friendliness, and integration with other Google services. Google Sites is often used for personal projects, educational purposes, and small business websites.
Overview of Google Sites as a Website Builder
Google Sites offers an intuitive and straightforward way to build websites. Its drag-and-drop interface makes it easy for users to create custom layouts, add content, and modify the site’s appearance. It’s particularly popular among users who want to create a website quickly without the complexities of more advanced web development tools.
Features and Tools Available in Google Sites
Google Sites provides a variety of features and tools that make website creation accessible:
- Customizable Templates: Pre-designed templates that users can customize to fit their needs.
- Text and Image Integration: Simple tools for adding and editing text and images.
- Embedding Capability: Ability to embed external content like videos, maps, and Google Drive documents.
- Collaboration Options: Seamless collaboration, allowing multiple users to edit and manage the site.
- Responsive Design: Automatic adjustment of the website’s layout to look good on both desktops and mobile devices.
The Role of Images in Website Design
Images play a crucial role in website design, especially in a platform like Google Sites. They help in making the site visually appealing, breaking up text to improve readability, and conveying information or emotions that text alone may not. Proper use of images can significantly enhance the user experience, grab attention, and convey a message effectively.
Understanding Google Sites’ User Interface
Google Sites’ user interface is designed for ease of use. It provides a clean and straightforward workspace where users can add components, such as images, by simply dragging and dropping them into place. The interface allows for easy resizing and positioning of images, making it simple to create a visually appealing layout.
Accessibility and Compatibility Considerations
When using images in Google Sites, it’s important to consider accessibility and compatibility:
- Alt Text: Adding alternative text to images improves accessibility for users who rely on screen readers.
- Image Quality and Size: High-quality images should be used without being so large that they slow down site loading times.
- Mobile Responsiveness: Ensuring images look good on various devices, maintaining their impact across different screen sizes.
Adding Images to Google Sites: A Practical Guide
Images are a vital part of any website, adding visual interest and conveying information that words alone might not. Adding images to a Google Sites page is straightforward, thanks to its user-friendly interface. Here’s a step-by-step guide to help you seamlessly integrate images into your Google Sites pages.
Step-by-Step Guide to Uploading Images
- Open Your Google Site: Log in to Google Sites and open the website where you want to add images.
- Choose the Location for Your Image: Click on the section of the page where you want to insert an image.
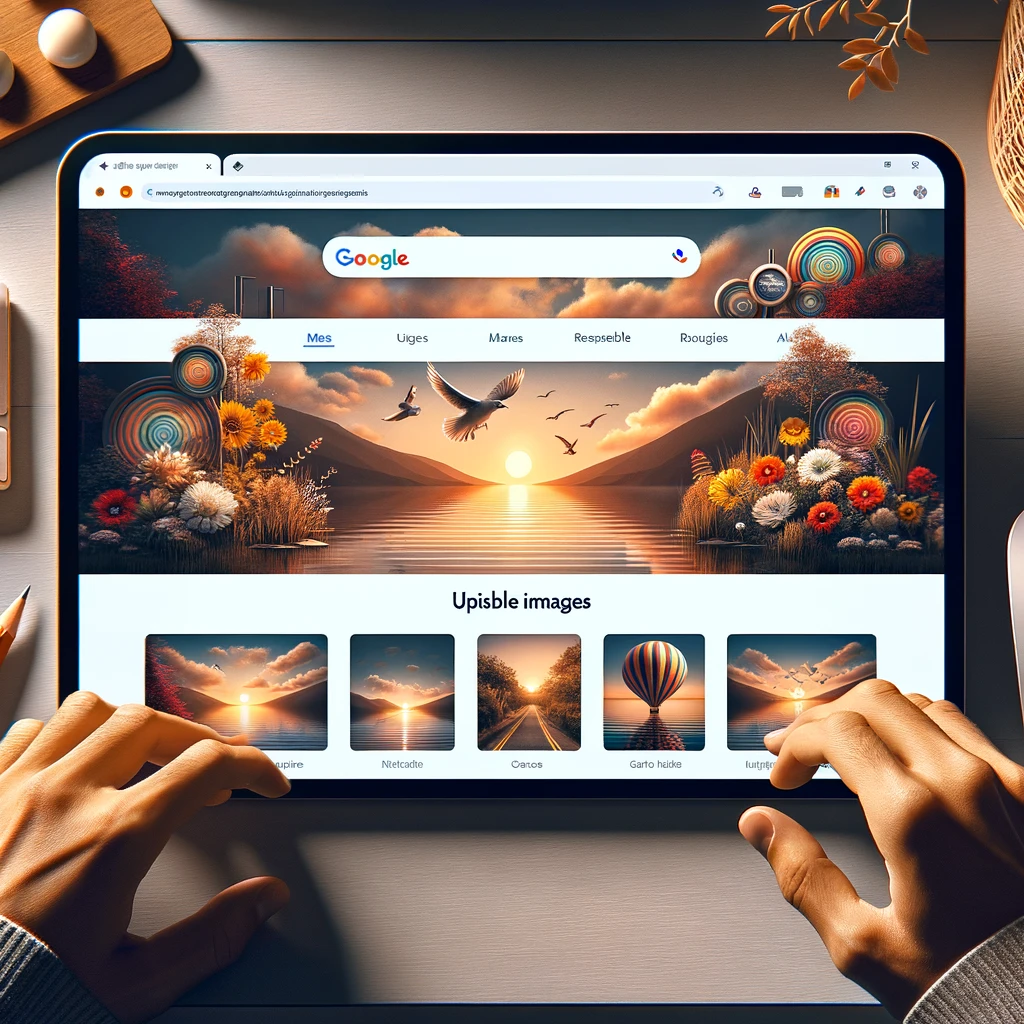
- Insert the Image: Click on the “Insert” option on the right-hand side, then select “Image”. You have the options to upload an image from your computer, select from your Google Drive, use a URL, or search from Google images directly.
- Upload or Select Your Image: If you’re uploading an image from your computer, browse and select the file. If using Google Drive or URL, follow the prompts to select or paste the respective link.
Supported Image Formats and Size Limitations
Google Sites supports various image formats, including JPG, GIF, PNG, and BMP. Be mindful of the file size; while Google Sites is quite accommodating, excessively large files can slow down your site’s load time. It’s generally recommended to keep individual image file sizes under 5MB for optimal performance.
Adjusting Image Placement and Alignment
Once the image is uploaded:
- Resize the Image: Click and drag the corners of the image to resize it to fit your layout.
- Change Image Alignment: Click on the image, and you will see options to align it to the left, center, or right of the section, or you can make it a full-width image.
- Text Wrapping: If you want text to wrap around the image, click on the image and select the “Wrap text” option, then move the image to the desired position in your text.
Using Google Drive for Image Hosting
For easy access and organization, you can host your images on Google Drive:
- Upload Images to Google Drive: Store your images in a folder on Google Drive.
- Insert from Google Drive: In Google Sites, use the “Insert” option and choose “From Drive” to select and insert images directly into your site.
Tips for Efficient Image Management
- Optimize Images: Before uploading, optimize images for web use – this means balancing quality and file size.
- Organize Your Images: If you have many images, keep them organized in Google Drive for easy access.
- Use Descriptive File Names: This makes it easier to find and manage your images, especially if you have a lot.
Optimizing Images for Google Sites
Proper image optimization is crucial for creating an efficient and visually appealing website on Google Sites. Optimizing images can enhance site speed, improve user experience, and contribute positively to SEO.
Importance of Image Optimization
Optimized images load faster, consume less bandwidth, and provide a better user experience. Large, unoptimized images can significantly slow down your website, leading to longer load times and potentially affecting visitor engagement and SEO ranking.
Tools for Resizing and Compressing Images
Several online tools and software applications are available for resizing and compressing images:
- Adobe Photoshop: Offers advanced features for resizing and compression.
- GIMP: A free, open-source image editor that can resize and compress images.
- Online Tools: Websites like TinyPNG or ImageOptim offer convenient image compression without the need for software installation.
Balancing Quality and Load Time
When optimizing images, the goal is to find a balance between image quality and file size:
- Resize the Image: Scale down the image to the maximum size it will be displayed on your website. Images should be no larger than necessary.
- Compress the Image: Reduce the file size without significantly impacting visual quality. A common practice is to aim for a compression that reduces the file size by 60-80%.
- Choose the Right Format: JPEG is typically best for photographs, while PNG is preferable for images requiring transparency.
SEO Considerations for Images
Optimized images can also benefit your site’s SEO:
- Descriptive File Names: Use clear, descriptive file names for your images. This helps search engines understand and index your content.
- Alt Text: Always add alt text to your images. Alt text improves accessibility and helps search engines understand the context of the image.
Best Practices for File Naming and Alt Text
- File Naming: Use meaningful and descriptive names, incorporating relevant keywords if possible. For example, use “red-sports-car.jpg” instead of “image1.jpg”.
- Alt Text: Provide concise, descriptive alt text that accurately represents the image. For example, “red Corvette sports car” is more informative than just “car”.
Creating Engaging Visual Content for Your Website
Engaging visual content is crucial in attracting and retaining visitors to your site. Well-chosen images, thoughtful layout designs, and the strategic use of text and graphics can significantly enhance the overall appeal and effectiveness of your website.
Choosing the Right Images for Your Site
Selecting the appropriate images is key to creating a compelling website:
- Relevance: Choose images that are directly relevant to your content and help to convey your message.
- Quality: High-resolution images that look professional and clear enhance your site’s credibility.
- Diversity: Use a variety of images, including photos, illustrations, and infographics, to maintain visitor interest.
Using Images to Enhance User Engagement
Images can be powerful tools for increasing user engagement:
- Emotional Connection: Use images that evoke emotions or tell a story to create a deeper connection with your audience.
- Calls to Action: Incorporate images that encourage visitors to take action, such as subscribing or purchasing.
- Infographics: Utilize infographics to present complex information or data in an easily digestible and visually appealing manner.
Creating a Visually Appealing Layout
A well-designed layout is critical in enhancing the visual appeal of your site:
- Balance and White Space: Ensure your pages are not cluttered. Balanced layouts with adequate white space make content more readable and visually appealing.
- Consistent Layout: Use a consistent layout across pages for a cohesive look.
- Mobile Responsiveness: Ensure your layout and images look good on various screen sizes and devices.
Incorporating Text and Graphics with Images
Combining text and graphics with images can enhance message clarity and visual interest:
- Overlay Text: Overlaying text on images can create powerful headers or banners. Ensure the text is readable by using contrasting colors or text shadows.
- Graphics and Icons: Use graphical elements and icons to complement text and add a visual break in content.
Consistency and Branding Through Visuals
Maintaining visual consistency helps in building your brand identity:
- Color Scheme: Stick to a consistent color palette that reflects your brand.
- Style Consistency: Use a consistent style of images and graphics throughout your site to reinforce brand identity.
- Branding Elements: Incorporate your logo and other branding elements in images and headers for brand recognition.
Utilizing Google Sites’ Image Galleries
Google Sites offers the functionality to create and customize image galleries, allowing for an organized and visually appealing display of images. Utilizing image galleries effectively can enhance the user experience, making your site more engaging and professional.
Creating and Customizing Image Galleries
- Add a Gallery: In Google Sites, click on the “Insert” panel and select “Image carousel”. You can then choose to upload images or select from those already in your Google Drive.
- Customize Your Gallery: Once your images are uploaded, you can customize the gallery. This includes changing the size of the gallery, the order of images, and adding captions or descriptions to each image.
Organizing Images in Galleries
- Categorize Images: Organize images into categories for easier navigation. For example, a travel website might categorize images by location.
- Sequential Order: If your images tell a story or follow a sequence, arrange them in the order that best narrates the story.
Gallery Layouts and Display Options
Google Sites offers different layout options for image galleries:
- Grid Layout: Displays images in a clean, organized grid format. Suitable for galleries with multiple images that are equally important.
- Carousel Layout: Displays one image at a time in a slide-show format, with the option for users to navigate through the images.
Interactive Features in Image Galleries
- Clickable Images: You can make images clickable, linking them to other pages or external websites, which can be useful for providing more information or for eCommerce purposes.
- Hover Effects: Adding hover effects on images (like a change in opacity or a text overlay) can make your gallery more interactive and engaging.
Tips for Curating Gallery Content
- Quality Over Quantity: Choose high-quality images that add value to your content. Avoid overloading galleries with too many images.
- Consistent Image Style: Maintain a consistent style or theme in your images to give your gallery a cohesive look.
- Update Regularly: Keep your gallery fresh and relevant by regularly updating the images.
Integrating Images with Site Content
Effectively integrating images with site content is crucial in enhancing the overall appeal and user experience of a website. The right balance between text and images can significantly improve the way information is communicated and perceived.
Strategies for Image and Text Integration
- Complementary Pairing: Choose images that complement and reinforce the message of your text. The visuals should add context or further explanation to your written content.
- Layout Balance: Ensure a harmonious balance between text and images. Avoid overwhelming the viewer with too much visual or textual information in one area.
Using Images to Complement Website Copy
- Illustrate Key Points: Use images to visually represent key points in your copy. For instance, a graph or chart can effectively summarize complex data discussed in the text.
- Break Up Text: Images can be used to break up long sections of text, making the content more digestible and engaging.
Visual Storytelling Techniques
- Narrative Flow: Arrange images in a way that they tell a story or guide the visitor through your content. This can involve using a series of images that visually narrate a process or development.
- Emotive Imagery: Select images that evoke emotions or set a mood, complementing the emotional tone of your text.
The Role of Images in Navigation and CTA
- Directional Cues: Use images as directional cues to guide users towards important elements like CTAs (Call To Actions). For example, an image can direct attention towards a ‘Sign Up’ or ‘Learn More’ button.
- Interactive Visuals: Incorporating interactive images, like rollover effects on menus or buttons, can enhance navigation and encourage engagement with CTAs.
Ensuring Readability and User Experience
- Image Size and Placement: Ensure images are appropriately sized and placed so as not to distract from or overpower the text. They should add to the user experience, not detract from it.
- Alt Text and Captions: Use alt text and captions to describe images, which is important for SEO and accessibility. This helps users who rely on screen readers and also provides context when an image cannot be displayed.
- Mobile Responsiveness: Make sure images scale correctly on different devices, maintaining the integrity of your layout and ensuring a consistent user experience across all platforms.
Legal and Ethical Considerations in Using Images
When using images, especially in a digital environment like a website, it’s crucial to understand and respect both legal and ethical considerations. This involves being aware of copyright laws, sourcing images appropriately, and ensuring ethical practices in image representation and alteration.
Understanding Copyright and Image Use
- Copyright Law: Images are often protected by copyright, meaning they cannot be used without permission from the copyright holder.
- Fair Use: In some cases, images can be used under the ‘fair use’ doctrine, which allows for limited use in specific contexts like education, news reporting, or commentary. However, fair use can be a complex legal area and may vary by country.
Sourcing Free and Licensed Images
- Free Images: Websites like Unsplash, Pixabay, and Pexels offer high-quality images that can be used for free, often under a Creative Commons license or similar terms.
- Licensed Images: Stock photo websites such as Shutterstock or Getty Images provide images that can be used legally after paying a licensing fee.
The Ethics of Image Alteration and Representation
- Altering Images: While it’s common to edit or alter images for clarity or aesthetic purposes, excessive alteration can be ethically questionable, especially if it misrepresents reality or manipulates the viewer’s perception.
- Respectful Representation: Ensure that images are used in a context that is respectful and considerate, avoiding perpetuating stereotypes or misrepresenting individuals or groups.
Citing Image Sources and Giving Credit
- Crediting the Creator: When using images, especially those that are free or under Creative Commons, it’s ethical and sometimes legally required to credit the source or the creator.
- Following License Requirements: Some image licenses may have specific requirements for how the image and the credit are displayed; always adhere to these guidelines.
Avoiding Common Legal Pitfalls
- Assuming Free Access: Don’t assume that all images found online are free to use. Always verify the source and licensing before using an image.
- Ignoring Copyright Notices: Pay attention to any copyright notices associated with an image and respect the stipulated usage rights.
- Overlooking Institutional Policies: If you’re working within an organization, be aware of any internal policies regarding image use.
Advanced Image Features in Google Sites
While Google Sites is known for its simplicity and ease of use, it also offers capabilities for more advanced image features. These can enhance the visual appeal and interactivity of your website.
Using Animations and Interactive Elements
- Animations: Google Sites does not natively support complex animations. However, you can add GIFs for simple motion graphics.
- Interactive Elements: For more interactive experiences, consider embedding external content that includes animations or interactive features.
Embedding Videos and Other Media
- Embedding Videos: Google Sites allows you to embed videos directly from YouTube or upload them from your computer. This can be a great way to enhance your content visually.
- Integrating Other Media: You can also embed other media types, such as Google Maps or Google Docs, directly into your site, providing a richer user experience.
Custom HTML and CSS for Image Customization
While Google Sites is primarily a drag-and-drop builder, it offers some capability to embed custom HTML, including CSS for styling:
- Custom HTML: Use the “Embed” option to insert custom HTML code, which can include external styles or scripts for more control over how your images are displayed.
- CSS Styling: Although limited, custom CSS can be used within the HTML embeds to apply specific styles to your images or other elements.
Integrating Third-Party Image Tools
For more advanced image functionalities, you can integrate third-party tools:
- Image Galleries: Use tools like Lightbox or Slider to create dynamic image galleries, then embed them into your Google Sites page.
- Image Editing Tools: Utilize external image editing tools to enhance your images before uploading them to Google Sites.
Creating Responsive Design for Various Devices
Google Sites automatically ensures that your site is responsive; however, it’s important to consider how your images will look on different devices:
- Test on Multiple Devices: Regularly check how your site and its images appear on various screen sizes to ensure a consistent experience.
- Image Size and Placement: Be mindful of the size and placement of your images. Larger images may need to be resized or appropriately positioned to ensure they are effective on both desktop and mobile devices.
Troubleshooting Common Image Issues in Web Design
Encountering image issues is a common part of web design. Identifying and resolving these problems efficiently is crucial for maintaining the aesthetic and functionality of your website.
Solving Image Upload and Display Problems
- Check File Format and Size: Ensure your images are in a web-friendly format (like JPG, PNG, or GIF) and are not too large, which can hinder upload and display.
- Internet Connection: A poor internet connection can affect image upload. Check your connection if you’re experiencing upload failures.
- Permissions and Settings: Confirm that you have the necessary permissions to upload images and that there are no settings preventing image uploads.
Addressing Formatting and Alignment Challenges
- Use Grids and Guides: Many website builders offer grid lines or guides to help align images. Use these tools to maintain consistency across your pages.
- Responsive Design Tools: Utilize your site builder’s responsive design features to ensure images align correctly on different devices.
- Manual Adjustments: Sometimes, manual adjustment of image placement may be required for optimal alignment.
Optimizing for Different Browsers and Devices
- Cross-Browser Testing: Test your website in different browsers to ensure images display correctly across all of them.
- Responsive Testing: Regularly check how your images appear on various devices, including smartphones and tablets.
- Image Optimization Tools: Use online tools to optimize images for faster loading times without compromising quality.
Updating and Replacing Images
- Easy Access to Original Files: Keep a well-organized library of your original images for easy replacement or updating.
- Regular Checks: Periodically review your website to identify images that need updating, especially if they contain time-sensitive information.
- Update Alt Text and Descriptions: When replacing images, remember to update the alt text and descriptions to match the new images.
Tips for Regular Maintenance and Updates
- Scheduled Reviews: Set a regular schedule to review and update your website’s images and content.
- Backup Your Site: Regularly backup your website to prevent data loss, including images and other media files.
- Stay Informed: Keep up with best practices for web design and image optimization to ensure your site remains current and efficient.
Future Trends and Updates in Google Sites
Keeping abreast of upcoming features and trends in Google Sites is important for web designers and users who rely on this platform for creating and maintaining their websites. Understanding potential updates and being prepared for changes can help ensure that your site remains modern, functional, and relevant.
Upcoming Features and Tools in Google Sites
- Enhanced Customization: Look out for updates that offer more customization options, potentially allowing for more advanced design capabilities.
- Improved Collaboration Features: As remote work becomes more prevalent, anticipate advancements in real-time collaboration tools within Google Sites.
- Integration with Other Google Services: Expect deeper integrations with Google’s suite of tools and services, enhancing the platform’s usability and functionality.
Predictions for Web Design Trends
- Responsive and Mobile-First Design: With the increasing use of mobile devices, expect continued emphasis on responsive and mobile-first design in web development.
- AI and Machine Learning: Predictions include more AI-driven tools for web design, potentially offering automated design suggestions or optimization tips.
- Accessibility and Inclusivity: Web design is likely to focus more on accessibility and inclusivity, ensuring websites are usable by all, regardless of ability or device.
Staying Updated with Google Sites Developments
- Official Google Sites Blog and Forums: Regularly check Google’s official communication channels for announcements regarding new features or updates.
- Webinars and Online Tutorials: Participate in webinars or tutorials offered by Google or third-party experts to stay informed about the latest features and best practices.
Learning Resources and Community Support
- Online Communities: Engage with online communities and forums dedicated to Google Sites for peer support, tips, and shared learning.
- Training Courses: Explore online courses or training programs that focus on Google Sites and web design trends.
- YouTube Tutorials: Utilize free resources like YouTube tutorials, which can be a great source of up-to-date information and practical demonstrations.
Preparing for Future Changes and Enhancements
- Flexible Design Approach: Adopt a flexible design approach, making it easier to adapt your site when new features and trends emerge.
- Regular Site Reviews: Periodically review and update your site to keep it aligned with the latest web design best practices.
- Feedback and Analytics: Utilize site feedback and analytics to understand user interaction with your site, helping to inform adjustments and improvements.
FAQs: Enhancing Your Google Sites with Images
1- What is Google Sites and its primary use?
Google Sites is a web-based platform provided by Google, allowing users to create and design websites easily without coding knowledge. It’s commonly used for personal projects, educational purposes, and small business websites due to its simplicity and integration with Google services.
2- Can you list some key features of Google Sites?
Key features of Google Sites include customizable templates, simple tools for adding and editing text and images, the ability to embed external content like videos and maps, options for collaboration, and responsive design for good appearance on various devices.
3- Why are images important in website design on Google Sites?
Images are crucial in website design for enhancing visual appeal, breaking up text to improve readability, conveying emotions and information, and improving user experience. They play a significant role in attracting and retaining viewers’ attention.
4- How user-friendly is Google Sites’ interface for adding images?
Google Sites offers a user-friendly interface, allowing users to add images easily through a drag-and-drop feature. It allows for simple resizing and positioning of images to create visually appealing layouts.
5- What should be considered when using images in Google Sites for accessibility and compatibility?
When using images, consider adding alternative text for accessibility, ensuring high-quality images with appropriate sizes for faster loading, and checking mobile responsiveness to ensure images appear well on various devices.
6- How do you upload and adjust images in Google Sites?
To upload an image, click on the desired section, select “Insert,” then “Image,” and choose how to upload. You can resize the image by dragging its corners and align or wrap text around it using available options.
7- What image formats and size limitations does Google Sites support?
Google Sites supports JPG, GIF, PNG, and BMP formats. It’s recommended to keep individual image sizes under 5MB for optimal site performance.
8- Can I use Google Drive for image hosting in Google Sites?
Yes, you can host images on Google Drive and then insert them directly into your Google Sites pages using the “Insert” option and selecting “From Drive.”
9- What are some tips for optimizing images for Google Sites?
Optimize images by balancing quality and file size, resizing them to fit your layout, compressing them to reduce file size, choosing the right format (like JPEG for photos), and adding descriptive file names and alt text.
10- How can I create engaging visual content for my Google Sites website?
Choose relevant, high-quality, and diverse images to match your content, use images to make emotional connections and convey information, create a visually appealing layout with balanced images and text, and maintain consistent styling for branding.
References & Links:
- Google Sites Help – Insert images, image carousels, and GIFs: Explore the official guide for inserting and managing images in Google Sites. This resource offers practical advice on adding, adjusting, and optimizing images for your website. Visit: https://support.google.com/sites/answer/2500646?hl=en
- com – Google Sites & Google Workspace Specialists – Embedding Content: This guide provides insights on embedding various types of content, including images, into Google Sites, enhancing the visual appeal and interactivity of your site. Check out: https://www.steegle.com/