How to Create the Best Handmade Gifts for Special Occasions
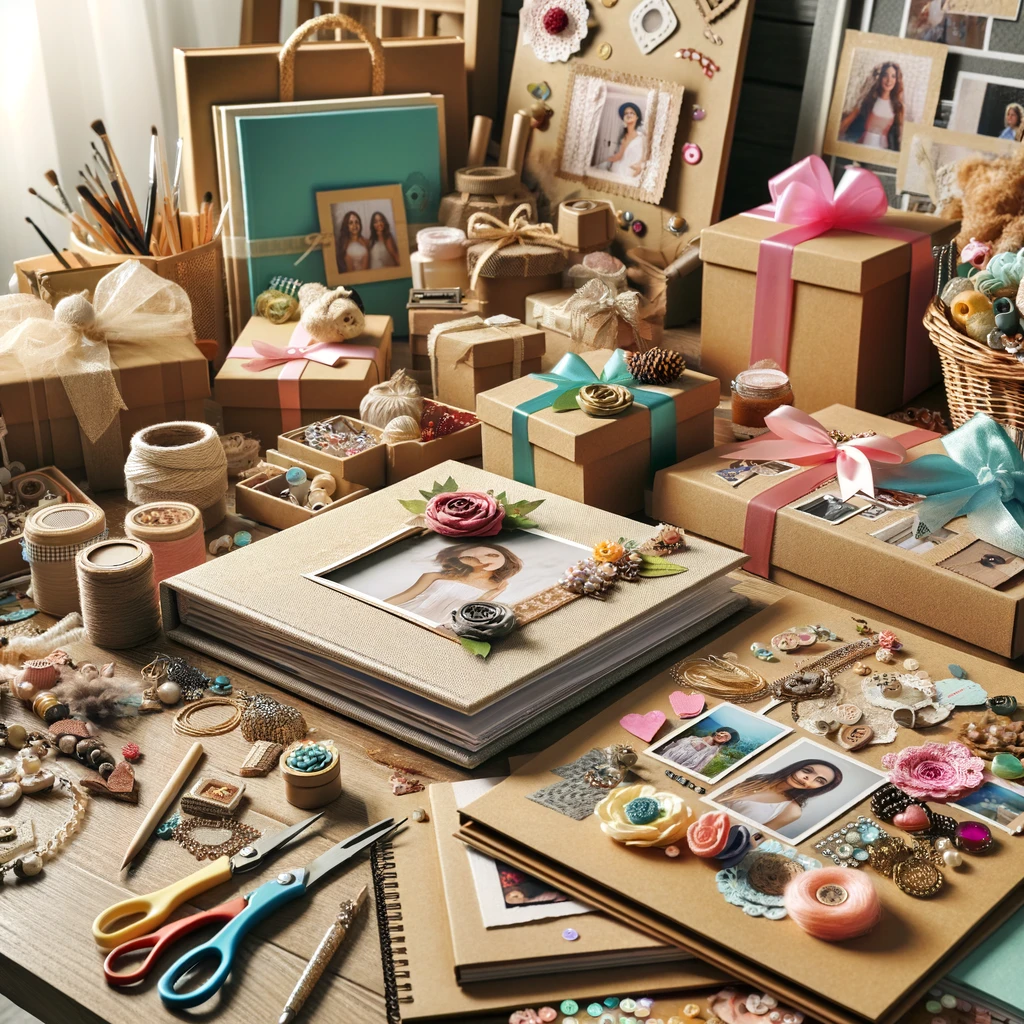
Personalized Photo Albums and Scrapbooks
Creating personalized photo albums and scrapbooks is a delightful way to preserve memories and tell a story through images and decorations. This guide will help you choose the right materials, design engaging layouts, add personal touches, and bind your creations beautifully. We’ll also explore ideas for occasion-specific themes.
Choosing the Right Materials and Themes
Materials:
- Album or Scrapbook: Choose a high-quality album or scrapbook with acid-free pages to ensure the long-term preservation of your photos and memorabilia.
- Adhesives: Use photo-safe adhesives like double-sided tape, photo corners, or glue dots that won’t damage your prints.
- Decorations: Select stickers, stamps, washi tapes, and embellishments that complement your theme.
Themes:
- Base your theme on the content of your photos or the occasion (e.g., travel, family, holidays). This will guide your choice of colors, decorations, and overall layout.
Tips for Layout Design and Photo Placement
- Plan Your Layout: Sketch out a few layout ideas before you start. Consider the number of photos per page and how they’ll interact visually.
- Balance: Maintain a balance between photos, text, and decorative elements. Too many photos crowded together can overwhelm the page.
- Focal Points: Design each page around a focal point, such as a standout photo or a uniquely decorated corner.
- Chronology: For event albums like weddings or vacations, arrange photos chronologically to narrate the story as it unfolded.
Adding Personal Touches with Captions and Decorations
- Captions: Add handwritten captions or printed text to give context to the photos. Share insights, dates, locations, or funny anecdotes.
- Decorative Elements: Use stamps, stickers, and drawings to add flair. These elements should complement the photo’s theme without overpowering it.
- Interactive Elements: Include pockets, tags, or fold-outs to make the scrapbook interactive and engaging.
Tools and Techniques for Binding and Cover Design
Binding:
-
- Spiral Binding: Offers flexibility and ease of opening. Ideal for thicker scrapbooks.
- Book Binding: Provides a classic look. Use bookbinding tape and thread for a durable finish.
Cover Design:
-
- Personalize: Decorate the cover with a title, a key photo, or decorative elements that hint at the theme inside.
- Protection: Consider using a durable material like leather or canvas for the cover to protect the contents.
Ideas for Occasion-Specific Themes
Weddings: Use a color scheme from the wedding, including invitations, and dress fabric samples. Dedicate pages to guests, the ceremony, the reception, etc.
Birthdays: Feature each year or milestone. Use bright colors and fun patterns. Include guest signatures, gift cards, and birthday messages.
Travel: Organize by location or trip. Use maps as backgrounds, include tickets, and write about experiences or cultural insights.
Custom Jewelry and Accessories
Creating custom jewelry and accessories is a delightful blend of art and craftsmanship. From choosing the right materials to the final touches in packaging, each step is an opportunity to infuse personal style and creativity into wearable art. This comprehensive guide will explore the basics of handmade jewelry-making, discuss material selection, and provide inspiring design ideas for necklaces, bracelets, and earrings. We’ll also cover how to beautifully package your creations as gifts and offer tutorials suitable for beginners and advanced crafters alike.
Basic Techniques for Making Handmade Jewelry
Handmade jewelry encompasses a variety of techniques, each contributing to the uniqueness and beauty of the final piece. Key techniques include:
Wire Wrapping
One of the most versatile skills in jewelry making, wire wrapping allows you to secure beads, stones, and other embellishments without the need for soldering. It involves bending wire to create hooks, loops, and decorative spirals that hold materials in place.
Stringing
Perhaps the simplest technique, stringing involves threading beads onto a string or wire. The choice of material, like nylon, silk, or metal, depends on the design and the weight of the beads used.
Soldering
This technique involves using a metal alloy, known as solder, to join metal pieces together without melting them. Soldering is essential for creating metal frames or intricate metalwork in jewelry.
Mastering these techniques requires patience and practice but provides a strong foundation for creating diverse and intricate jewelry pieces.
Selecting Materials: Beads, Metals, and Stones
The choice of materials significantly influences the style and quality of the finished jewelry piece. Each material brings its unique texture, color, and weight.
Beads
Beads come in a vast array of materials, including glass, wood, metal, and ceramic. Each type offers different weights and aesthetics. For instance, glass beads add a touch of elegance and shine, perfect for dressy accessories.
Metals
Popular metals used in jewelry making include sterling silver, gold, copper, and brass. Each metal has its characteristics; for example, copper is excellent for practicing new techniques due to its malleability and lower cost.
Stones
Semi-precious stones such as turquoise, amethyst, and jade add natural beauty to jewelry. Precious stones like diamonds and sapphires bring a level of sophistication and are typically used in more elaborate pieces.
Design Ideas for Necklaces, Bracelets, and Earrings
- Designing jewelry is where creativity truly shines. Here are some ideas to inspire your next projects:
- Necklaces
- Create layered necklaces of varying lengths to add depth to an outfit. Use different textures and sizes of beads to create visual interest.
- Bracelets
- Consider charm bracelets that can be personalized with initials, birthstones, or small pendants. Alternatively, bangle bracelets in mixed metals can offer a modern and stylish look.
- Earrings
- Experiment with drop earrings using delicate wire frames and bead clusters. For something more dramatic, oversized hoop earrings adorned with beads and feathers can make a bold statement.
Handcrafted Candles and Soaps
Handcrafting candles and soaps is a fulfilling and creative activity that allows for endless customization and personalization. Whether you’re a beginner or an experienced artisan, this guide will provide you with essential tips and instructions on making your candles and soaps. We’ll explore everything from the basic supplies and safety measures to fragrance and color combinations, soap-making techniques, custom molds, and tips on presenting your creations as thoughtful, personalized gifts.
Introduction to Candle Making: Supplies and Safety
Candle-making is an accessible craft that requires a few key supplies and adherence to safety guidelines to ensure a smooth and enjoyable crafting experience.
Supplies Needed
- Wax: The most commonly used waxes are soy, paraffin, and beeswax. Each type has its benefits and characteristics.
- Wicks: The size and type of wick will vary depending on the wax type and candle size.
- Fragrance oils: These are specially formulated for candle making to ensure they burn safely and effectively.
- Colorants: These can be dyes or pigments designed to work with your chosen wax.
Safety Guidelines
- Work Area: Keep your crafting area free of clutter and ensure it is well-ventilated.
- Heat Source: Use a reliable heat source, such as a double boiler, to melt the wax, and never leave it unattended.
- Temperature: Monitor the wax temperature with a thermometer to avoid overheating.
Understanding these basics sets the foundation for successful candle crafting, emphasizing creativity over complexity.
Fragrance and Color Combos for Personalization
The ability to customize fragrances and colors is one of the delights of making candles and soaps. Here are some popular combinations:
Candles
- Lavender and Chamomile: A soothing blend perfect for relaxation.
- Citrus and Mint: A refreshing and energizing mix ideal for kitchens and bathrooms.
- Cinnamon and Apple: A warm, inviting scent that’s great for holidays.
Soaps
- Rosemary and Lemon: This combo offers a clean, invigorating scent.
- Oatmeal and Honey: Ideal for sensitive skin, providing a gentle, nurturing experience.
- Charcoal and Tea Tree: Excellent for detoxifying and deep cleansing.
Experimenting with these combinations can help you create signature products that reflect personal tastes and styles.
Step-by-Step Guide to Soap Making at Home
Soap making can be approached in several ways, but one of the most popular methods for beginners is melt and pour. Here’s how to do it:
- Choose a Soap Base: Options include glycerin, shea butter, and goat milk bases.
- Melt the Base: Cut your base into small chunks and melt them in a microwave or double boiler.
- Add Fragrances and Colorants: Once melted, add your chosen scents and colors.
- Pour into Molds: Pour the mixture into soap molds. Spritz with alcohol to remove any bubbles.
- Cool and Cure: Allow the soaps to cool and harden for several hours before unmolding.
This method is simple and safe, making it a great way to begin your soap-making journey.
Custom Molds and Embellishments
Custom molds and embellishments can transform your candles and soaps from simple homemade items to exquisite, personalized gifts.
Candles
Use silicone molds to create candles in various shapes, or add embellishments like dried flowers or herbs on the surface of your candles for a decorative touch.
Soaps
Silicone soap molds are available in countless designs, from simple geometric shapes to intricate patterns. Adding small toys, dried flowers, or coffee grounds can add visual interest and functionality to your soaps.
Tips for Presenting Candles and Soaps as Gifts
Presentation is key when gifting handcrafted items. Use these tips to enhance the gift-giving experience:
- Packaging: Choose attractive packaging that protects the item while also showcasing its beauty. For soaps, consider using paper wraps or burlap tied with twine. For candles, small boxes or organza bags can be elegant choices.
- Labeling: Include labels that reflect the candle or soap’s ingredients and scent. This not only adds a professional touch but also informs the recipient about the product they’re receiving.
- Extras: Include matches with candles or a small soap dish with soaps as thoughtful additions that complement your gift.
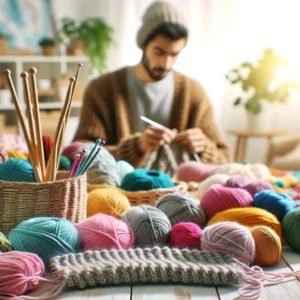
Knitted or Crocheted Items
Knitting and crocheting are timeless crafts that allow you to create everything from practical everyday items to thoughtful gifts infused with personal touch. This guide will walk you through selecting the best yarns and patterns, provide ideas for crafting scarves, hats, and sweaters, and introduce the basics for beginners. We’ll also cover finishing techniques that ensure durability and improve appearance, along with tips on including care instructions with your handmade gifts.
Selecting Yarns and Patterns Suitable for Gifts
Choosing the right yarn and pattern is crucial when crafting knitted or crocheted gifts. The key is to match the recipient’s style and the project’s functional requirements with suitable materials and designs.
Yarn Selection
- Fiber Type: Opt for hypoallergenic fibers like cotton or bamboo for baby items and soft, luxurious fibers like merino wool or alpaca for winter wear.
- Color: Consider the recipient’s color preferences. Neutral colors tend to be safe choices, while vibrant colors can add a fun touch.
- Yarn Weight: Heavier yarns chunky or bulky are great for quick projects and warm items like winter hats or scarves. Lighter weights are ideal for delicate, detailed patterns.
Pattern Selection
- Skill Level: Choose patterns that match your skill level. Simple patterns are best for beginners, while complex patterns can challenge more experienced crafters.
- Functionality: Ensure the pattern suits the intended use of the item, whether it’s a warm blanket or a decorative doily.
Ideas for Scarves, Hats, and Sweaters
Crafting scarves, hats, and sweaters provides a wide range of options, from simple designs for beginners to intricate ones for more advanced crafters.
Scarves
- Infinity Scarves: These are stylish and easy to wear. Use a simple stitch pattern with a luxurious yarn for an elegant look.
- Cabled Scarves: Ideal for those who want to practice more advanced stitches that add texture and warmth.
Hats
- Beanies: A quick project suitable for all skill levels. Personalize with different colors or add pom-poms for a fun touch.
- Slouchy Hats: Trendy and comfortable, these are popular gifts for teens and young adults.
Sweaters
- Baby Sweaters: These small projects are a delightful way to welcome a new family member.
- Classic Pullovers: A timeless gift that can be customized in color and detailing such as cables or lace.
Basics of Knitting and Crocheting for Beginners
For those new to these crafts, mastering a few basic techniques can enable the creation of a variety of items.
Knitting
- Cast On: The foundation of any knitting project.
- Knit and Purl Stitches: The two basic stitches upon which all other techniques are built.
- Bind Off: Securing the final stitches in your project to prevent unraveling.
Crocheting
- Slip Knot and Chain Stitch: Starting points for any crochet project.
- Single, Double, and Triple Crochet Stitches: Basic stitches that form the backbone of most crochet projects.
- Finishing: Fastening off to secure the final stitches.
Finishing Techniques to Enhance Durability and Appearance
Proper finishing techniques are vital for ensuring your knitted and crocheted items look polished and hold up over time.
- Weaving in Ends: This method secures yarn tails on the wrong side of the project to prevent unraveling.
- Blocking: Shaping the finished project by wetting or steaming the fibers and pinning them in place until dry.
- Seaming: Joining pieces together using stitches that match the pattern of the fabric for a seamless look.
Care Instructions to Include with Your Gift
Including care instructions with your gift ensures that the recipient knows how to keep the item looking its best.
- Washing and Drying: Specify if the item should be hand washed, machine washed in a gentle cycle, or dry cleaned. Mention appropriate drying methods, like laying flat to dry.
- Storage: Advice on proper storage to avoid stretching or moth damage, such as storing in a cool, dry place or using moth repellents.
Homemade Gourmet Baskets
Creating homemade gourmet baskets is a thoughtful and personalized way to show appreciation, celebrate special occasions, or simply share the joy of delicious, handcrafted treats. Whether you opt for a basket filled with sweets, savories, or a delightful mix of both, the key to a memorable gourmet gift basket lies in the theme selection, quality of homemade goodies, presentation, and attention to dietary preferences. Let’s dive into how to curate the perfect gourmet basket, including recipes for breads, jams, and treats, alongside tips for beautiful presentation and considerations for allergy-friendly options.
Choosing a Theme: Sweets, Savories, or Mixed
Selecting a theme for your gourmet basket will guide your choices in recipes and presentation, ensuring a cohesive and appealing gift.
Sweets Basket
Ideal for dessert lovers, a sweets-themed basket can include a variety of homemade cookies, chocolates, truffles, and cakes. Complement these with artisanal jams and honey for a touch of luxury.
Savories Basket
Perfect for those who prefer less sugary options. Include items like homemade breads, cheeses, cured meats, and pickles. Add some specialty mustards or a jar of olives to enhance the flavors.
Mixed Basket
A mixed basket offers the best of both worlds, appealing to a broader taste palette. Combine sweet treats with savory snacks like gourmet popcorn, mixed nuts, and small batches of artisanal cheese.
Recipes for Homemade Breads, Jams, and Treats
Homemade items add a personal touch that can’t be matched by store-bought products. Here are a few recipes to consider:
Homemade Bread
- No-Knead Artisan Bread: Simple yet delicious, requiring only flour, water, salt, and yeast. Bake until golden brown for a rustic look and heavenly aroma.
Jams
- Strawberry Vanilla Jam: Combine fresh strawberries, sugar, and a vanilla bean for a classic jam with a gourmet twist. Perfect for pairing with both sweets and savories.
Treats
- Chocolate Truffles: Use high-quality dark chocolate mixed with cream to create rich truffles. Roll in cocoa powder, nuts, or toasted coconut for variety.
Presentation Tips for Gourmet Gift Baskets
The presentation of your gourmet basket is almost as important as what’s inside. Here’s how to ensure it looks as good as it tastes:
- Basket Selection: Choose a basket that matches the theme of your gift. Wooden crates or woven baskets add a rustic charm.
- Filling and Lining: Line the basket with decorative tissue paper or a linen napkin. Add shredded paper or straw as filler to keep items secure and add to the aesthetic.
- Arrangement: Place taller items in the back and layer the rest in front for easy visibility. Ensure that delicate items are well-protected.
Including Personalized Notes and Recipes
A personalized note adds an emotional touch, making the gift feel more special. Include handwritten recipes of the homemade items in your basket; this not only adds a personal touch but also invites the recipient to try making them.
Suggestions for Allergy-Friendly and Dietary Specific Baskets
Catering to dietary needs or allergies is thoughtful and essential for making sure your gift can be fully enjoyed.
- Gluten-Free Options: Opt for gluten-free flour in your bread and treat recipes.
- Vegan Varieties: Use plant-based substitutes like coconut oil and almond milk in jams and desserts.
- Nut-Free Choices: Avoid common allergens like peanuts and tree nuts, and clearly label any items that might be produced in facilities processing nuts.
Painted Pottery and Ceramics
- Pottery and ceramics have long been cherished for their blend of utility and aesthetic beauty. From beginners to seasoned artisans, the process of molding clay into functional and decorative items is a rewarding journey. This article explores various aspects of this craft, focusing on tools, techniques, decoration, and even tips for gifting and transporting your creations.
Getting Started with Pottery: Tools and Techniques
- When you first dip your toes into the world of pottery, the variety of tools and techniques available can be overwhelming. Essential tools for beginners include a potter’s wheel, which is pivotal for shaping the clay, and various hand tools like rib tools, loop and ribbon tools, needle tools, and wire cutters. These tools aid in adding detail, shaping, and finally removing your piece from the wheel.
- The first technique to master is wedging, a method used to prepare clay by kneading it to eliminate air bubbles and ensure consistency. After wedging, centering the clay on the wheel is crucial — it sets the foundation for a successful pottery piece. As the wheel spins, your hands will learn to guide the clay, shaping it into bowls, vases, or other forms. It’s a skill that improves with practice, patience, and persistence.
Design and Decoration Techniques for Beginners
- Once you’ve shaped your basic pottery forms, the next exciting step is decoration. Underglazing, where colors or patterns are applied to the pottery before it’s glazed and fired, allows for vibrant designs that won’t fade. Sgraffito is another popular technique involving scratching through a surface layer of paint or slip to reveal a lower layer of contrasting color, adding depth and texture to the piece.
- Beginners might also try slip trailing, a method where liquid clay is squeezed onto the pottery surface to create raised patterns. Each of these techniques can be adjusted and experimented with, depending on the artist’s vision and the characteristics of the clay used.
Firing and Finishing Your Pieces
- Firing is a transformative process that hardens clay into permanent ceramic form. Most beginners will start with bisque firing, where the clay is heated slowly to drive out any remaining moisture. This is followed by glaze firing, where the pottery is coated in glaze and fired again to achieve a glossy finish. Understanding your kiln’s specific properties and the types of glazes that best suit your creative expression is crucial for this stage.
- Safety during firing is paramount. Ensure that the kiln is placed in a well-ventilated area and that you’re using heat-resistant gloves when handling hot ceramics. Monitoring the kiln’s temperature and timing is also essential to prevent over-firing, which can lead to damaged pieces.
Ideas for Useful Household Items to Gift
- Pottery makes for heartfelt and practical gifts. Items like custom mugs, plates, soap dishes, or even intricate jewelry holders are not only functional but can also be personalized to suit the recipient’s taste. Adding textures, stamps, or carvings can make these gifts unique, making them cherished for years to come.
- Beginners can focus on simple forms and gradually introduce more complex shapes as they gain confidence. The joy of gifting something made by hand adds a personal touch that cannot be replicated by store-bought items.
Packing and Transporting Fragile Ceramic Gifts
- Once your pottery pieces are ready and you’ve decided on those you want to gift, the next challenge is ensuring they reach their new owners intact. Investing in high-quality packing materials is key. Bubble wrap, packing peanuts, and sturdy boxes are essential. Each item should be wrapped securely, and boxes should be filled to prevent any movement during transport.
- Labeling the packages as fragile and ensuring the courier is aware of the contents’ delicate nature can further safeguard your ceramic gifts. Additionally, consider insurance for shipping higher-value items to provide peace of mind against potential damage during transport.
DIY Art and Decorations
- Creating DIY art and decorations is a delightful way to personalize your living space or give meaningful gifts that carry a piece of your creative spirit. This guide dives into various techniques and ideas, from canvas painting to eco-friendly projects using recycled materials, aimed at enhancing your home décor or creating memorable gifts.
Canvas Painting Ideas for Home Decor Gifts
- Canvas painting offers a versatile platform for expressing artistic ideas that can be tailored to any home décor style. Whether you’re thinking of creating abstract art, landscapes, or personalized portraits, each piece can contribute uniquely to a room’s ambiance.
- Beginners might start with simple geometric designs or minimalist landscapes using basic acrylic paints. For a more personal touch, consider painting something that resonates with the gift recipient—a favorite place, a pet, or a cherished memory. Techniques like blending colors directly on the canvas or using stencils for sharp lines can help achieve professional-looking results. These personalized canvases make exceptional gifts, showcasing thoughtfulness and creativity.
Techniques for Creating Mixed Media Art
- Mixed media art is fascinating due to its layering of various materials and textures. This form of art allows for the incorporation of anything from paper and fabric to metal and found objects, bound together with adhesives or integrated into paint.
- One approach is to start with a simple canvas or wood base, applying layers of textured paper or fabric as the background. Acrylic paints can be used to unify the composition with color, while additional elements like buttons, beads, or small metal pieces can add focal points and interest. Mixed media art is perfect for DIY decorators looking to experiment with materials and techniques, offering limitless possibilities for personal expression.
Custom Wall Hangings and Decorative Pieces
- Creating custom wall hangings allows for the exploration of various crafts, including weaving, macramé, or even simple wooden cutouts. Macramé wall hangings with woven beads or feathers can bring a bohemian flair to any space. Similarly, wooden cutouts painted or decorated with techniques such as decoupage can transform a plain wall into a statement piece.
- These custom creations can be tailored to match the décor style of your or a recipient’s home, making them ideal gifts that add a touch of handmade sophistication.
Using Recycled Materials for Eco-Friendly Gifts
- Utilizing recycled materials in art projects not only fosters creativity but also promotes environmental responsibility. Glass jars can be turned into candle holders or small planters, old books into floating bookshelves or picture frames, and scrap fabric into colorful quilts or tapestries.
- Creating with recycled materials requires seeing potential beauty in everyday objects, transforming them into eco-friendly gifts that serve both aesthetic and practical purposes. These projects are particularly appreciated by those who value sustainability and unique, handcrafted items.
Wrapping and Framing Artwork for Presentation
- The presentation of your artwork can significantly enhance its appeal as a gift. Proper framing, whether for paintings, photographs, or mixed media pieces, involves choosing a frame that complements the style of the artwork without overpowering it. Consider the decor style of the artwork’s intended home when selecting frames.
- For wrapping, using high-quality paper, ribbons, and even custom tags adds a professional touch that enhances the gifting experience. Art-specific packaging materials can protect your creations from damage while creating an impressive unveiling moment for the recipient.
Sewn and Embroidered Gifts
- Handcrafted sewn and embroidered gifts are treasured for their personal touch and the thoughtfulness they convey. This guide explores the basics of sewing and embroidery, providing a solid foundation for creating a variety of personalized items like pouches, pillows, and custom apparel. Whether you’re a novice or looking to enhance your skills, these projects can add unique flair to your gift-giving occasions.
Basics of Sewing by Hand and Machine
- Learning to sew, whether by hand or machine, begins with understanding the essential tools and techniques. For hand sewing, you’ll need needles, thread, scissors, and fabric. Basic stitches such as the running stitch, backstitch, and slip stitch are foundational and used in many projects for assembling pieces and finishing edges.
- Machine sewing speeds up the process and allows for stronger seams. Beginners should familiarize themselves with their sewing machine, practicing threading, loading bobbins, and using different stitch settings. Starting with straightforward projects like simple tote bags or pillowcases can help build confidence and skill.
Projects: Pouches, Pillows, and Custom Apparel
- Pouches are excellent beginner projects because they require minimal materials and introduce essential skills like sewing straight seams and installing zippers. They can be crafted in various sizes and fabrics, making them versatile gifts for storing makeup, gadgets, or stationery.
- Pillows offer a canvas for creativity, ranging from simple square designs to more elaborate shapes featuring appliques or patchwork. They can be customized to match the decor of the recipient’s home, adding a cozy and thoughtful element.
- Custom apparel can range from simple scarves and hats to more complex items like shirts or skirts. These projects allow for personal expression and can be tailored to the recipient’s style, making them deeply personal gifts.
- Introduction to Embroidery: Materials and Patterns
- Embroidery adds a distinctive touch to any fabric project. The basic materials needed include embroidery floss, needles, an embroidery hoop, and fabric. Beginners might start with simple patterns using basic stitches like the satin stitch, French knot, and chain stitch.
- Patterns can be drawn freehand, traced from various sources, or even printed directly onto fabric using soluble transfer methods. Embroidery can be used to embellish plain fabric on projects like those mentioned earlier, or to add decorative details to existing garments and textiles.
- Personalizing Gifts with Monograms or Quotes
- Personalization can transform a simple gift into a keepsake. Adding monograms or embroidered quotes to items like towels, handkerchiefs, or book covers adds a level of sophistication and thoughtfulness. Monograms can be designed using different fonts and styles to suit the recipient’s taste, while quotes can be chosen to resonate with their personal experiences or inspirations.
- Best Fabrics and Threads for Durable Gifts
- Choosing the right fabrics and threads is crucial for ensuring that your gifts are not only beautiful but also durable. Cotton is versatile, easy to handle, and suitable for both sewing and embroidery. For items that require more durability, like tote bags or outdoor cushions, consider heavier fabrics like canvas or denim.
Plant Arrangements and Terrariums
Plant arrangements and terrariums make excellent gifts and decorative items for homes and offices, providing a touch of greenery and nature indoors. This guide will explore how to select appropriate plants, craft beautiful terrariums, and care for unique plant setups, ensuring they remain vibrant and healthy.
Choosing Plants Suitable for Indoor Environments
When selecting plants for indoor environments, consider factors like light availability, humidity, and temperature. Ideal choices include:
- Snake plants and ZZ plants, which thrive in low-light conditions and require minimal watering, making them perfect for office spaces or dimly lit rooms.
- Pothos and philodendrons, which are tolerant of a wide range of lighting conditions and have air-purifying qualities.
- Spider plants, are known for their ability to thrive under indirect sunlight and their resilience in a variety of indoor conditions.
These plants are not only visually appealing but also beneficial for indoor air quality, making them practical choices for gift-giving.
Crafting a Terrarium: Containers, Soil, and Accessories
Creating a terrarium involves several key components:
- Container: Choose a clear glass container that complements the size and number of plants you plan to include. Containers with wide openings are preferable for moisture-loving plants, while those with narrow openings suit dry-environment plants like succulents.
- Soil: Use a well-draining soil mix, specifically designed for terrarium plants. For succulents and cacti, a sandy soil mix works best to prevent water retention and root rot.
- Accessories: Adding layers of sand, pebbles, and activated charcoal not only enhances drainage and controls moisture but also adds aesthetic layers visible through the glass container.
- Decorative elements: Personalize with stones, figurines, or moss to create a mini landscape, enhancing the visual appeal of your terrarium.
Tips for Arranging and Caring for Succulents
Succulents are popular for their ease of care and variety of shapes, sizes, and colors. When arranging succulents:
- Placement: Ensure each plant receives enough space to grow. Overcrowding can hinder their development and increase moisture levels, leading to rot.
- Watering: Water sparingly, allowing the soil to dry out completely between watering sessions to prevent root rot.
- Light: Succulents prefer bright, indirect light. If natural light is limited, consider using a grow light to supplement their light needs.
Decorating Plant Gifts with Stones and Figurines
Adding decorative elements such as stones, pebbles, and small figurines can transform a simple plant gift into a themed arrangement. Choose decorations that match the recipient’s interests or the decor of the space where the plant will be placed. This personal touch can make the gift feel more thoughtful and tailored.
Instructions for Plant Care to Include with Your Gift
Providing a care instruction card with your plant gift is essential for ensuring that the recipient knows how to maintain the plant properly. Include:
- Watering requirements: Specify how often and how much water the plant needs.
- Light requirements: Indicate the amount of light the plant should receive.
- Temperature and humidity preferences: Note the ideal conditions for the plant to thrive.
- Special care tips: Include any specific tips related to the type of plant or arrangement, such as trimming or fertilizing.
Handmade Stationery and Cards
Handmade stationery and cards offer a personal touch that cannot be replicated by store-bought items. Creating your own stationery, such as cards, notebooks, and calendars, allows for customization and personalization that make these items special and cherished. This guide will walk you through the materials and techniques needed for DIY stationery, provide ideas for embellishments and themes, and offer tips on how to present these creations as thoughtful gifts.
Materials Needed for DIY Stationery
To start your DIY stationery project, you’ll need a few basic materials:
- Paper: Choose high-quality paper or cardstock in various textures and colors. Watercolor paper is excellent for projects involving paint, while heavier cardstock is ideal for cards and postcards.
- Cutting tools: Scissors and a paper cutter ensure clean edges.
- Adhesives: Glue sticks, double-sided tape, and liquid glue are essential for assembling your pieces without mess.
- Writing utensils: Pens, markers, and pencils are necessary for writing and drawing.
- Rulers and stencils: These help in measuring and creating consistent patterns or lines.
With these supplies, you can begin crafting a variety of stationery items, each with a unique flair.
Techniques for Making Cards, Notebooks, and Calendars
- Cards: Learn basic folding techniques for cards, such as the standard fold or gatefold. Use rubber stamps, stickers, or drawing techniques to decorate.
- Notebooks: Stitching or stapling pages together is a simple way to create handmade notebooks. Cover designs can be customized with fabrics, prints, or collages.
- Calendars: Use templates to print monthly grids. Personalize each month with images, quotes, or unique designs that reflect the seasons or important dates.
Embellishing Your Projects with Stamps, Paint, and Fabric
Embellishments add personality and style to your stationery projects:
- Stamps: Create custom stamps or purchase pre-made ones to add consistent motifs to your projects.
- Paint: Watercolors, acrylics, or spray paints can be used to add color and texture.
- Fabric: Attach small pieces of fabric with spray adhesive or fabric glue for a tactile element.
These embellishments can transform simple pieces into intricate works of art, making each piece of stationery uniquely appealing.
Themes for Special Occasions (Thank Yous, Holidays, etc.)
Choosing a theme for your stationery can be guided by the occasion:
- Thank You Cards: Use elegant and understated designs. Floral prints or simple borders can convey appreciation beautifully.
- Holiday Cards: Reflect the spirit of the holiday with appropriate colors, images, and decorations. For Christmas, think reds, greens, and golds with motifs like trees or stars.
- Birthdays: Bright, cheerful colors and fun graphics like balloons or cake designs make birthday cards festive.
Each theme provides an opportunity to experiment with different materials and designs, making each creation a joy to give and receive.
Packaging and Presenting Stationery as Gifts
Proper packaging can elevate your handmade stationery to a professional level and protect it during delivery:
- Boxes: Place cards and envelopes in decorative boxes lined with tissue paper.
- Wrapping: Use clear cellophane or craft paper tied with ribbon for a rustic look.
- Labels: Include a custom label or tag that describes the contents or includes a personal message.
When presenting stationery as a gift, consider including a variety of items—such as a set of cards, a couple of notebooks, and a matching pen—to create a thoughtful and cohesive gift set.
FAQs:
Here are ten frequently asked questions about creating the best handmade gifts for special occasions:
1- What are the best materials for making a personalized photo album or scrapbook? High-quality, acid-free pages are essential for longevity, along with photo-safe adhesives like double-sided tape or glue dots to avoid damaging prints.
2- How can I choose a theme for a scrapbook? Base your theme on the content of your photos or the specific occasion, such as travel, family, holidays, or weddings, guiding your choice of colors, decorations, and layout.
3- What are some effective layout design tips for photo albums? Plan your layout by sketching ideas, maintain a balance between photos and decorative elements, design around a focal point, and arrange photos chronologically for event albums.
4- How can I add personal touches to a scrapbook? Incorporate handwritten captions, use decorative stamps or stickers, and add interactive elements like pockets or tags to make the scrapbook engaging.
5- What techniques can be used for binding homemade scrapbooks? Spiral binding offers flexibility, while bookbinding with tape and thread provides a durable and classic finish.
6- What are some personalized gift ideas that involve sewing or embroidery? Handmade pouches, pillows, and custom apparel like scarves or hats can be personalized with monograms or unique patterns tailored to the recipient’s taste.
7- How can I make my handmade candles and soaps more special? Customize your creations with fragrance and color combinations that suit the recipient’s preferences and add unique molds or embellishments like dried flowers or herbs.
8- What basic techniques are useful for beginners making handmade jewelry? Techniques like wire wrapping, stringing, and simple soldering are foundational and can be used to create a variety of beautiful and unique jewelry pieces.
9- How can I package handmade gifts attractively? Use decorative boxes, craft paper, or natural materials like burlap, and consider adding labels with a personalized message or care instructions.
10- What are some ideas for DIY art or decorations that can be gifted? Consider creating canvas paintings, mixed media art, or custom wall hangings using materials and themes that resonate with the recipient’s interests or home décor style.
References and Links:
- Scrapbook.com – A comprehensive resource for all scrapbooking needs, including materials, tutorials, and design ideas.
- Michaels – Provides a wide range of scrapbooking supplies and decorations like stickers, stamps, and embellishments.
- Pinterest – Excellent for gathering creative ideas and inspiration for personalized photo albums and scrapbooks.
- Hobby Lobby – Offers a variety of scrapbooking materials, including themed decorations and high-quality albums.
- Etsy – A marketplace for finding unique and handmade scrapbooking materials and decorations.
- Joann – Supplies a diverse selection of scrapbooking adhesives and tools suited for crafting personalized albums.
- Scrapbooking-Warehouse – An online store focused on providing a wide array of scrapbooking supplies at warehouse prices.
- AC Moore Arts and Crafts – Offers materials and tools for scrapbooking along with inspirational project ideas.
- Blick Art Materials – Known for high-quality art supplies that can also be used for scrapbooking projects.
- Archiver’s – Specializes in archival-quality scrapbooking supplies that ensure long-term preservation of photographs and memorabilia.