

The Best DIY Projects for Home Decor in 2024
Sustainable Style: Eco-Friendly DIY Projects for Modern Homes
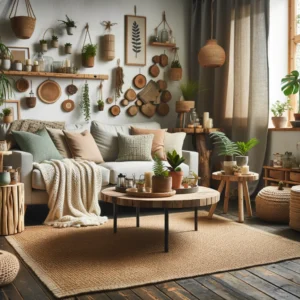
Embracing sustainability in home decor not only helps the environment but also adds unique character and charm to your living space. From upcycled furniture to zero-waste decor tips, there are plenty of eco-friendly DIY projects you can undertake to create a stylish, modern home. Here’s how to get started.
Upcycled Furniture: Transforming Old Pieces into Chic Decor
Upcycling old furniture is a fantastic way to reduce waste and give your home a personalized touch.
- Sanding and Painting: Revive old wooden chairs, tables, or cabinets with thorough sanding and a fresh coat of eco-friendly paint or varnish.
- Reupholstering: Change the fabric of old sofas or chairs to match modern decor trends using sustainable materials like organic cotton or recycled polyester.
- Creative Repurposing: Turn an old ladder into a bookshelf, transform a door into a dining table, or use wooden crates as modular storage.
DIY Plant Holders: Creative Uses for Recycled Materials
Plants are essential for bringing natural beauty and air purification into the home. Create unique plant holders using recycled materials:
- Tin Cans and Jars: Clean and paint old tin cans or glass jars to serve as charming plant holders.
- Discarded PVC Pipes: Cut and paint PVC pipes for a modern look, perfect for mounting on walls or hanging from ceilings.
- Old Tires: Use old tires painted in vibrant colors as eye-catching outdoor planters.
Homemade Natural Dyes: Adding Color the Eco-Friendly Way
Natural dyes made from kitchen scraps or garden resources are perfect for adding color to textiles without the environmental impact of synthetic dyes.
- Avocado Pits and Skins: Boil avocado pits and skins to create a lovely pink dye perfect for fabrics like cotton and linen.
- Onion Skins: Yellow onion skins can produce a beautiful and vibrant orange dye.
- Turmeric: A simple and accessible dye, turmeric creates a bright yellow hue, ideal for dyeing curtains, pillowcases, or tablecloths.
Repurposed Wood Wall Art: Crafting Statement Pieces
Old wood can be transformed into stunning wall art that adds a rustic or modern touch to any room.
- Wood Pallet Art: Disassemble wood pallets and use the planks to create geometric patterns or rustic signs.
- Branch and Twig Collages: Arrange found wood branches and twigs into artistic designs, securing them on a backing board for a natural look.
- Driftwood Sculptures: Assemble driftwood pieces into interesting shapes or frames for a nautical-themed decor.
Zero Waste Decor: Tips for Minimizing Environmental Impact
Creating zero-waste home decor involves careful planning and creativity.
- Choose Reusable Decor: Invest in decor that you can repurpose for different seasons or occasions instead of single-use items.
- Eco-Friendly Materials: Opt for materials that are either made from renewable resources, are recyclable, or are harvested in an environmentally responsible way.
- DIY Over Buying New: Whenever possible, make your own decorations from materials you already have at home, reducing the need to buy new items.
Minimalist Magic: Simple DIY Projects for a Sleek Home
Embracing a minimalist aesthetic can transform your home into a serene, streamlined space where every object has both purpose and beauty. Here are some simple DIY projects that embody minimalist design, offering functional simplicity and modern elegance without overwhelming your space.
Floating Shelves: A Step-by-Step Guide
Floating shelves add clean lines and functional storage to any room, making them a perfect fit for a minimalist decor.
Materials Needed:
- Wooden boards (cut to the desired length)
- Heavy-duty wall brackets
- Screws and wall anchors
- Drill
- Level
- Sandpaper
- Paint or wood stain
Instructions:
- Prepare the Wood: Sand the wooden boards until smooth. Apply paint or stain and let dry.
- Install Brackets: Use a level to mark the bracket placements on the wall, ensuring they are straight and evenly spaced. Drill holes and insert wall anchors.
- Attach Shelves: Screw the brackets into the wall anchors, then place the wooden boards on top of the brackets and secure them with screws from underneath.
- Finishing Touches: Clean up any visible screws or hardware to maintain a sleek look.
Handmade Minimalist Clocks: Function Meets Form
Create a minimalist clock that blends seamlessly with your decor while providing functionality.
Materials Needed:
- Clock mechanism kit (available online or at craft stores)
- Wooden circle or square base
- Drill
- Paint or wood stain
- Clock hands (preferably in a contrasting color for visual impact)
Instructions:
- Prepare the Base: Sand and paint or stain the wooden base.
- Install the Clock Mechanism: Drill a hole in the center of the wooden base. Follow the manufacturer’s instructions to attach the clock mechanism.
- Attach Clock Hands: Attach the clock hands to the mechanism. Ensure they have enough space to move freely.
- Mount the Clock: Hang the clock on a wall or place it on a shelf as a decorative element.
DIY Geometric Mirrors: Modern Aesthetic on a Budget
Geometric mirrors add a contemporary touch and can make any space appear larger and brighter.
Materials Needed:
- Mirror tiles
- MDF or plywood base
- Strong adhesive (like E6000)
- Paint (optional)
- Saw (if cutting custom shapes)
Instructions:
- Design Layout: Arrange the mirror tiles on the MDF or plywood base to create a geometric pattern.
- Attach Mirrors: Use adhesive to secure each tile in place. Allow to dry completely.
- Add Finishing Touches: Paint the edges of the base for a cohesive look if desired.
Scandinavian Style Plant Stands: Understated and Stylish
Scandinavian style is known for its simplicity and functionality, making a DIY plant stand an ideal project.
Materials Needed:
- Wooden dowels or legs
- Circular or square top (wooden)
- Screws and drill
- Wood glue
- Paint or stain
Instructions:
- Prepare the Top: Sand and finish the wooden top with paint or stain.
- Attach Legs: Position the wooden dowels or legs at equal distances around the perimeter of the top. Secure with screws and reinforce with wood glue.
- Finish: Allow the glue to dry completely before moving the plant stand into place.
Effortless Chic: Creating a Minimalist Mood Board
A mood board can help you visualize and plan your minimalist space effectively.
Materials Needed:
- Large poster board or corkboard
- Magazines, fabric swatches, paint chips
- Scissors and adhesive
Instructions:
- Collect Materials: Gather images, textures, and colors that inspire your minimalist design.
- Arrange Visually: Place items on the board, experimenting with layout until you achieve a visually pleasing arrangement.
- Secure Items: Use adhesive to permanently attach your materials to the board.
Vintage Vibes: Creating Timeless Charm with DIY Projects
Embracing vintage style in your home decor can add warmth, character, and a sense of history to your living space. Here are several DIY projects to help you infuse your home with that timeless vintage charm, using easily accessible materials and tools.
Distressed Wood Techniques: Achieving the Antique Look
Distressed wood can give new pieces an age-worn look that fits beautifully into vintage-style decor.
Materials Needed:
- Sandpaper (medium and fine grit)
- Wood stain
- Chalk paint
- Paintbrushes
- Soft cloths
- Vaseline (optional)
Instructions:
- Preparation: Start with bare wood. If the piece is already painted or varnished, sand it down to remove the finish.
- Base Coat: Apply a coat of wood stain. Allow it to dry completely to set the base color.
- Distressing: For areas you want to look worn, rub Vaseline lightly before painting. This will make the paint easy to remove in these spots.
- Paint: Apply a coat of chalk paint over the stain and Vaseline. Let it dry and then gently sand the areas with Vaseline to reveal the stain underneath, enhancing the distressed look.
- Seal: Wipe the piece with a soft cloth to remove dust and then apply a sealing coat if desired for protection.
DIY Lace Curtains: Adding Elegance to Windows
Lace curtains can soften the light and add a delicate touch to any room, enhancing the vintage aesthetic.
Materials Needed:
- Lace fabric (choose a pattern that complements your decor)
- Curtain rod
- Scissors
- Sewing machine or needle and thread
- Measuring tape
Instructions:
- Measure: Decide how long and wide you want the curtains to be, adding extra for hemming.
- Cut: Cut the lace fabric according to your measurements.
- Hem: Hem the edges to prevent fraying and create a clean finish.
- Hang: Install the curtain rod and hang your new lace curtains.
Reupholstering Vintage Chairs: A Practical Guide
Reupholstering old chairs is a fantastic way to breathe new life into vintage furniture.
Materials Needed:
- Old chair
- Screwdriver or staple remover
- Upholstery fabric
- Staple gun
- Upholstery foam (optional)
- Scissors
Instructions:
- Disassemble: Remove the existing fabric and staples from the chair using a screwdriver or staple remover.
- Replace Foam: If the foam cushioning is worn out, replace it with new upholstery foam cut to size.
- Cut Fabric: Cut your new fabric to fit the seat, allowing extra for securing it to the frame.
- Staple: Pull the fabric taut over the seat and secure it with a staple gun, working from the center outwards.
- Reassemble: Reattach the seat to the chair frame.
Creating a Gallery Wall with Vintage Frames
A gallery wall of vintage frames can create a focal point in any room, showcasing artwork or family photos.
Materials Needed:
- Assortment of vintage frames
- Hammer and nails
- Picture hanging wire
- Artwork or photos
Instructions:
- Arrange: Lay out the frames on the floor to plan your arrangement before hanging.
- Prepare Frames: Ensure each frame has a hanging mechanism. Attach wire if needed.
- Hang: Hang frames on the wall according to your planned layout, using a hammer and nails.
DIY Chalk Paint for Furniture Revival
Chalk paint is ideal for giving furniture a matte, vintage look that’s perfect for a rustic or shabby chic style.
Materials Needed:
- 1 part water
- 1 part plaster of Paris
- 3 parts latex paint in your chosen color
- Mixing container
- Paintbrush
Instructions:
- Mix: Combine the plaster of Paris and water until smooth, then add latex paint and mix thoroughly.
- Apply: Paint the furniture piece with chalk paint. You may need several coats for full coverage.
- Distress (optional): Once dry, lightly sand the edges and details to enhance the vintage look.
- Seal: Apply a wax or sealant to protect the paint if desired.
High-Tech Home Decor: Integrating Technology into DIY Projects
Incorporating technology into home decor not only enhances functionality but also brings a modern, futuristic feel to your living space. Here are some DIY projects that combine tech with traditional home elements to create innovative and practical solutions.
DIY Smart Mirrors: Reflecting the Future
Smart mirrors offer a futuristic look and practical features, displaying time, weather, news updates, or even your daily schedule.
Materials Needed:
- Two-way mirror (cut to the desired size)
- Monitor or an old computer screen
- Raspberry Pi or similar mini-computer
- Cables and connectors
- Frame materials (wood, metal, etc.)
- Tools for assembly (screwdriver, drill, etc.)
Instructions:
- Prepare the Display: Dismantle the monitor, removing unnecessary parts but keeping the LCD screen and circuit intact.
- Set Up Raspberry Pi: Install an operating system on your Raspberry Pi designed for smart mirrors, which can display information through part of the mirror.
- Assemble the Mirror: Place the two-way mirror in the frame. Mount the monitor behind the mirror and connect it to the Raspberry Pi.
- Configure and Customize: Program the Raspberry Pi to display the information you need, such as weather, time, or news feeds.
Building Custom LED Light Fixtures
LED lights are energy-efficient and can be customized into unique designs to fit any room’s aesthetic.
Materials Needed:
- LED strip lights
- Acrylic sheets or diffuser panels
- Aluminum channels
- Power supply
- Connectors and wiring
- Tools for cutting and assembly
Instructions:
- Design the Fixture: Plan your light fixture shape and size.
- Assemble the Frame: Cut aluminum channels to length and assemble them into your desired shape.
- Install LED Strips: Attach LED strips inside the channels and cover with acrylic sheets to diffuse the light.
- Connect to Power Supply: Wire the LEDs to the power supply and ensure all connections are secure.
- Mount the Fixture: Install the fixture in your desired location.
Automated Plant Watering Systems: Marrying Tech with Greenery
Keep your plants thriving with an automated watering system, perfect for busy individuals or frequent travelers.
Materials Needed:
- Water reservoir (bucket or large bottle)
- Water pump
- Tubing
- Arduino or timer
- Soil moisture sensors
- Power supply
Instructions:
- Set Up Sensors: Insert soil moisture sensors into the plant pots.
- Program the Arduino: Connect the Arduino to the sensors and program it to activate the pump when moisture levels drop below a set point.
- Install the Pump: Place the pump in the water reservoir and connect it to the plants via tubing.
- Test the System: Ensure the system waters the plants as needed without overwatering.
Creating a Home Charging Station: A DIY Solution
Organize and charge all your devices in one convenient location.
Materials Needed:
- Wooden box or organizer
- Multi-port USB charger
- Drill
- Sandpaper
- Paint or wood stain
- Velcro or adhesive clips for cable management
Instructions:
- Prepare the Box: Sand and paint or stain the wooden box.
- Cut Holes for Cables: Drill holes for the charging cables.
- Install USB Charger: Place the USB charger inside the box and route cables through the holes.
- Organize Cables: Use Velcro strips or adhesive clips inside the box to keep cables organized.
Tech-Enhanced Home Theaters: DIY Surround Sound Systems
Create a movie theater experience at home with a DIY surround sound system.
Materials Needed:
- Speakers (as per surround sound configuration)
- Receiver with surround sound capabilities
- Speaker wire
- Cable management tools
Instructions:
- Position the Speakers: Place the center, front, and rear speakers according to your room’s acoustics.
- Connect Speakers to Receiver: Use speaker wire to connect each speaker to the appropriate output on the receiver.
- Calibrate the System: Use the receiver’s calibration feature to adjust the sound levels of each speaker.
Rustic Retreats: DIY Projects for Cozy, Country-Inspired Homes
Creating a rustic retreat in your home can evoke a sense of warmth and charm. With a few simple DIY projects, you can infuse your living space with a cozy, country-inspired aesthetic that feels both welcoming and stylish. Here are some ideas to help you get started.
Handmade Wooden Lanterns: Lighting Up Your Space
Wooden lanterns add a soft, ambient light that enhances the rustic vibe of any room or outdoor space.
Materials Needed:
- Wood planks or reclaimed wood
- Wood glue
- Nails and hammer (or nail gun)
- Glass panels or clear plastic sheets
- Candles or LED lights
- Sandpaper
- Stain or paint
Instructions:
- Construct the Frame: Cut the wood to your desired size. Assemble into a box shape with an open top, using wood glue and nails to secure.
- Add Panels: Cut glass or clear plastic to fit each side of the lantern. Secure these panels with small nails or a strong adhesive.
- Finish: Sand any rough edges and apply a stain or paint to match your decor. If you prefer a weathered look, lightly sand after painting to reveal some of the wood beneath.
- Install Lighting: Place candles inside for a traditional look, or use battery-operated LED lights for safety.
Barn Door DIY: Adding Rustic Charm to Modern Homes
A sliding barn door can be a functional and striking addition to your home, perfect for creating a rustic feel.
Materials Needed:
- Wooden door slabs
- Sliding barn door hardware kit (including track and rollers)
- Drill
- Screws
- Measuring tape
- Level
- Stain or paint
Instructions:
- Prepare the Door: If necessary, trim the door to size. Sand, then stain or paint as desired. Let dry completely.
- Install the Hardware: Measure and mark the placement of the track above the doorway. Use a level to ensure it’s straight. Secure the track to the wall studs with screws.
- Mount the Door: Attach the rollers to the top of the door, then hang the door on the track according to the hardware instructions.
- Add Handles and Locks: Install handles and a lock mechanism if desired.
DIY Mason Jar Organizers: Versatile and Vintage
Mason jars are perfect for creating simple, vintage-style organizers that are both practical and charming.
Materials Needed:
- Mason jars of various sizes
- Hose clamps
- Wood plank
- Screws
- Drill
- Stain or paint
Instructions:
- Prepare the Wood: Cut the wood plank to the desired length. Sand and stain or paint it.
- Attach Hose Clamps: Secure hose clamps to the wood plank with screws, spacing them to match the size of your mason jars.
- Insert Jars: Place each jar into a clamp and tighten until secure.
- Mount the Organizer: Attach the completed organizer to a wall or inside a cabinet for storing utensils, art supplies, or bathroom essentials.
Hand-Painted Rustic Signs: Personalized Home Messages
Create personalized signs with hand-painted messages to add a unique touch to your rustic decor.
Materials Needed:
- Reclaimed wood planks
- Sandpaper
- Paint and brushes
- Stencils (optional)
- Sealer (for outdoor use)
Instructions:
- Prepare the Wood: Sand the wood planks to smooth any rough edges.
- Paint the Background: Apply a base coat of paint and let it dry. For a distressed look, lightly sand the edges.
- Add Text: Hand-paint your message or design. Use stencils if you prefer neat, uniform letters.
- Seal the Sign: If the sign will be placed outdoors, apply a sealer to protect against the elements.
Rustic Rope Rugs: A Touch of Texture
Rope rugs create a warm, textured base for any room, complementing a rustic interior beautifully.
Materials Needed:
- Thick natural fiber rope
- Hot glue gun and glue sticks
- Scissors
Instructions:
- Create the Shape: Coil the rope into your desired shape and size, applying hot glue periodically to hold the shape.
- Secure Ends: Ensure the end of the rope is securely glued down to prevent fraying.
- Finish: Allow the glue to cool and harden before placing the rug on the floor.
Bohemian Dreams: DIY Projects for a Free-Spirited Home
Creating a bohemian-inspired home involves incorporating eclectic, vibrant elements that reflect a carefree and artistic lifestyle. These DIY projects can help you infuse your space with boho chic decor, offering comfort and style through handmade crafts.
Macrame Wall Hangings: Crafting Boho Chic Decor
Macrame wall hangings are a staple in bohemian decor, adding texture and interest to any wall.
Materials Needed:
- Macrame cord
- Wooden dowel or branch
- Scissors
- Measuring tape
Instructions:
- Cut the Cord: Cut several pieces of macrame cord, each twice the length of your desired final product (allow for folding).
- Attach to Dowel: Fold each piece in half and use a lark’s head knot to attach it to the dowel.
- Knotting Design: Choose macrame knots like the square knot or spiral knot to create your design. You can add beads or embellishments for extra flair.
- Finish: Once your design is complete, trim the ends to create a clean edge. Hang the piece on a wall using the dowel or branch.
DIY Poufs and Floor Cushions: Comfort in Every Corner
Poufs and floor cushions offer additional seating and bring a cozy, laid-back vibe to any room.
Materials Needed:
- Fabric (choose vibrant, patterned material for a true boho look)
- Sewing machine or needle and thread
- Filler (polystyrene beads, cotton batting, or old clothes)
- Zipper or velcro (for closure)
Instructions:
- Cut the Fabric: Cut two circles for the top and bottom and a long rectangle that will wrap around the sides.
- Sew the Sides: Sew the rectangular piece into a loop and attach one of the circles to one end.
- Add Closure: Attach the zipper or velcro to the open end before sewing the other circle in place.
- Fill the Pouf: Fill the pouf with your chosen material through the closure.
- Seal and Enjoy: Seal the opening and place the pouf in your desired spot.
Colorful Tile Coasters: Bohemian Flair for Everyday Use
Tile coasters are not only functional but can also be a decorative element in your home.
Materials Needed:
- Small ceramic tiles
- Acrylic paints and brushes
- Sealant (mod podge or waterproof sealant)
- Felt pads
Instructions:
- Paint the Tiles: Clean the tiles and paint them with your desired designs. Let dry.
- Apply Sealant: Once the paint is dry, apply a layer of sealant to protect the design from moisture and wear.
- Attach Felt Pads: Stick felt pads to the bottom of each tile to prevent scratching surfaces.
Handwoven Baskets: Storage with Style
Handwoven baskets can be used for storage or as decorative plant holders.
Materials Needed:
- Rattan, willow, or any flexible, woven material
- Large needle
- Scissors
Instructions:
- Prepare the Material: Soak the weaving material until it’s flexible.
- Weave the Base: Start by weaving a flat circle for the base.
- Build the Sides: Gradually build up the sides by weaving in and out, layering the material.
- Finish: Secure the ends with a knot and trim any excess.
Patchwork Throw Pillows: Mixing Patterns and Textures
Patchwork pillows allow you to mix various fabrics, adding color and texture to your seating.
Materials Needed:
- Assorted fabric scraps
- Pillow form or stuffing
- Sewing machine or needle and thread
Instructions:
- Cut Fabric Squares: Cut squares of different fabrics.
- Arrange and Sew: Arrange the squares in a pleasing pattern and sew them together.
- Sew the Pillow: Sew the patchwork fabric into a pillowcase, leaving an opening to insert the pillow form or stuffing.
- Close the Opening: Hand stitch the opening closed.
Artistic Expression: DIY Projects to Showcase Creativity
Embracing DIY projects that allow for personal expression can transform your living space into a gallery of your own making. From creating abstract art to handcrafting candles, these projects let you showcase your creativity and add unique, personalized touches to your home.
DIY Abstract Canvas Art: Unleash Your Inner Artist
Abstract canvas art is a fantastic way to make a bold statement in any room, and it allows you to experiment with colors and textures.
Materials Needed:
- Canvas (any size)
- Acrylic paints
- Brushes and palette knives
- Masking tape (optional for geometric designs)
- Texturing medium (optional)
Instructions:
- Prepare Your Canvas: Set up your canvas in a well-ventilated area. Apply a base coat if desired and let it dry.
- Sketch a Design (optional): Lightly sketch your design with a pencil, or use masking tape to create geometric shapes.
- Apply Paint: Use brushes, sponges, or palette knives to apply acrylic paint. Experiment with layering colors and adding textures.
- Add Details: For more depth, add textures or mix in a texturing medium with your paint to create raised effects.
- Dry and Display: Allow your painting to dry completely before hanging or framing.
Handcrafted Ceramic Vases: Molding Personal Touches
Making your ceramic vases can be a rewarding project that results in a functional piece of art.
Materials Needed:
- Air-dry clay or pottery clay (if you have access to a kiln)
- Rolling pin
- Clay sculpting tools
- Paints and brushes
Instructions:
- Shape the Clay: Roll out your clay and mold it into the shape of a vase. Use sculpting tools to refine the shape and add personal touches.
- Let it Dry: If using air-dry clay, allow your vase to dry according to the clay instructions. If using pottery clay, bisque fire your vase in a kiln.
- Decorate: Once dry, paint your vase with designs that match your style.
- Seal: Apply a sealant to protect the paint and clay, especially if you’ll be using the vase with water.
DIY Stencil Art: Making Walls Speak
Stencil art is an easy and impactful way to add personality to your walls without permanent changes.
Materials Needed:
- Stencil (homemade or purchased)
- Acrylic or wall paint
- Stencil brush or sponge
- Painter’s tape
Instructions:
- Secure the Stencil: Use painter’s tape to hold your stencil in place on the wall.
- Apply Paint: Dab a stencil brush or sponge lightly in paint and apply it over the stencil. Use minimal paint to avoid bleeding under the stencil.
- Repeat: Move your stencil around the wall to create a repeated pattern or a singular focal point.
- Remove and Touch Up: Carefully remove the stencil and touch up any edges with a small brush.
Creative Candle Making: Custom Scents and Colors
Crafting your candles allows for the customization of scents and colors, creating the perfect ambiance for any room.
Materials Needed:
- Wax (soy wax for a cleaner burn)
- Wicks
- Fragrance oils
- Colorants (optional)
- Double boiler
- Candle molds or containers
Instructions:
- Melt Wax: Using a double boiler, melt the wax. Monitor the temperature with a thermometer to avoid overheating.
- Add Color and Scent: Once melted, add your chosen colorants and fragrance oils. Stir well.
- Prepare the Mold: Attach the wick to the bottom of the mold or container. Pour the wax mixture into the mold.
- Set and Trim: Allow the wax to cool and set completely. Trim the wick to about half an inch above the wax.
Mixed Media Decor Pieces: Combining Various Art Forms
Mixed media art pieces are visually striking and allow for the use of various techniques and materials in one artwork.
Materials Needed:
- Canvas or wood panel
- Assorted papers, fabrics, and embellishments
- Acrylic paints
- Glue or Mod Podge
- Scissors and brushes
Instructions:
- Layout Design: Plan your design by arranging papers, fabrics, and other materials on your canvas.
- Attach Materials: Glue your materials down in layers, starting with the flattest pieces.
- Incorporate Paint: Add acrylic paint to integrate or highlight different elements of your artwork.
- Finish and Seal: Once you’re satisfied with your design, seal your artwork with a clear acrylic sealer.
Small Space Solutions: DIY Projects for Compact Areas
Living in a compact space doesn’t mean you have to sacrifice style or functionality. With clever DIY projects, you can maximize your living area while keeping it stylish and organized. Here are some innovative ideas tailored for small spaces.
Vertical Gardens: Green Up Without Taking Space
Vertical gardens are a fantastic way to bring greenery into small spaces without sacrificing floor space.
Materials Needed:
- A wooden or metal frame
- Landscaping fabric
- Small potted plants or succulents
- Hooks and wall anchors
- Staple gun or screws
Instructions:
- Build or Modify the Frame: Use an existing frame or build one from wood or metal that fits your available wall space.
- Secure Landscaping Fabric: Attach landscaping fabric to the back of the frame using a staple gun or screws, creating pockets for plants.
- Install the Frame: Mount the frame on a wall with suitable hooks and anchors.
- Plant and Arrange: Insert small plants or succulents into the pockets. Choose plants that thrive in vertical spaces and require similar sunlight and watering conditions.
Murphy Beds: Maximizing Space with Style
A Murphy bed can transform a small area into a multipurpose space, ideal for studio apartments or guest rooms.
Materials Needed:
- Plywood or particle board
- Murphy bed hardware kit
- Drill and screws
- Paint or wood finish
- Mattress
Instructions:
- Construct the Bed Frame: Build the bed frame according to the dimensions of your mattress using plywood or particle board.
- Install the Hardware: Attach the Murphy bed hardware, which typically includes a mechanism for easy lifting and lowering of the bed.
- Finish and Mount: Finish the bed frame with paint or wood stain to match your decor. Securely mount the frame to the wall, ensuring it is well anchored to support the weight.
- Add Accessories: Consider adding shelves or a desk that folds out when the bed is stowed away.
DIY Under-Stair Storage Solutions
The space under the stairs is often underutilized. Creating storage here can help declutter other areas of your home.
Materials Needed:
- Measuring tape
- Plywood or MDF
- Hinges and drawer slides
- Handles and knobs
- Paint or finish
Instructions:
- Measure and Plan: Measure the under-stair area and design storage solutions such as pull-out drawers, cabinets, or shelves.
- Build the Units: Cut the plywood or MDF to create your storage units. Assemble using screws and glue.
- Install Hardware: Add hinges for doors or drawer slides for pull-out units.
- Finish and Install: Paint or finish the units to match your interior. Install the units under the stairs and add handles or knobs.
Collapsible Furniture: Folding and Sliding Designs
Collapsible furniture is ideal for small spaces, allowing you to clear out space when not in use.
Materials Needed:
- Hinges and folding brackets
- Plywood or lightweight wood
- Paint or varnish
- Tools for cutting and assembly
Instructions:
- Design Your Furniture: Plan designs for folding chairs, tables, or desks that can be easily stowed away.
- Construct: Build your furniture pieces, incorporating hinges or folding brackets where necessary to allow them to collapse.
- Finish: Paint or varnish your furniture for durability and aesthetic appeal.
Utilizing Mirrors to Enhance Small Spaces
Mirrors can make small spaces feel larger and more open by reflecting light and views.
Materials Needed:
- Large mirrors or mirrored tiles
- Adhesive or mounting hardware
- Frame materials (optional)
Instructions:
- Choose Locations: Identify where mirrors would be most effective, such as opposite windows or in narrow hallways.
- Prepare the Mirrors: If using tiles, arrange them to fit the designated space. Frame larger mirrors for added style.
- Install: Mount mirrors securely to the wall with appropriate hardware or adhesive.
Luxurious Touches: DIY Projects Adding a Touch of Glam
Elevate your home decor with a few DIY projects that incorporate luxurious materials and finishes, bringing a sense of opulence and comfort to any space. These projects are designed to add a touch of glamour without the high price tag of luxury goods.
DIY Velvet Headboards: Royal Comfort
A velvet headboard can transform your bedroom into a luxurious retreat with its rich texture and elegant appearance.
Materials Needed:
- Plywood (cut to the size of your desired headboard)
- Foam padding
- Velvet fabric
- Staple gun
- Wall mounting brackets
Instructions:
- Cut and Prepare the Plywood: Have your plywood cut to the desired size at a hardware store or cut it at home if you have the tools.
- Attach Foam Padding: Cover the plywood with foam padding for comfort and secure it with adhesive.
- Upholster with Velvet: Lay the velvet fabric face down, place the padded plywood on top, and pull the fabric tightly over the edges. Staple it to the back of the plywood, ensuring it’s taut and even.
- Mount the Headboard: Attach the mounting brackets to the back of the headboard and secure it to the wall behind your bed.
Homemade Gold Leaf Decorations: Sprinkling Elegance
Gold leaf can add a luxurious and sophisticated touch to decor items, making them stand out as focal points in your home.
Materials Needed:
- Gold leaf sheets
- Adhesive size (specifically for gold leaf)
- Soft brush
- Items to decorate (vases, picture frames, bowls)
Instructions:
- Prepare the Surface: Ensure that the item you are decorating is clean and dry.
- Apply Adhesive Size: Brush a thin layer of adhesive onto the areas you wish to gild. Allow it to become tacky as per the product instructions.
- Apply Gold Leaf: Carefully lay the gold leaf sheets over the adhesive. Press gently with a soft brush to smooth out the leaf and remove excess.
- Seal the Leaf: Once the gold leaf is applied, seal it with a clear sealer to protect it from damage.
DIY Faux Fur Throws: Adding Warmth and Luxury
Faux fur throws are perfect for adding coziness and a touch of glamour to your living or bedroom.
Materials Needed:
- High-quality faux fur fabric
- Lining fabric (such as soft velvet or satin)
- Sewing machine or needle and thread
Instructions:
- Cut Fabrics to Size: Cut the faux fur and lining fabric to the desired dimensions of your throw.
- Sew Together: Place the fabric’s right sides together and sew around the edges, leaving a small gap.
- Turn Right Side Out: Turn the throw right side out through the gap.
- Finish the Edges: Hand stitch the open gap closed.
Handmade Jewelry Organizers: Displaying Beauty
Create a custom jewelry organizer to display your pieces elegantly, adding both functionality and a decorative element to your room.
Materials Needed:
- Wooden frame or shadow box
- Velvet or felt (for backing)
- Hooks and small knobs
- Paint or stain
- Glue
Instructions:
- Prepare the Frame: Paint or stain your frame and let it dry.
- Line with Velvet or Felt: Cut your chosen fabric to fit inside the frame and glue it securely.
- Add Hooks and Knobs: Screw in hooks and knobs where needed to hang necklaces, bracelets, and earrings.
- Mount the Organizer: Secure the organizer to your wall or place it on a dresser.
Custom Bathroom Vanities: Luxury on a Budget
Upgrade your bathroom by creating a custom vanity that looks luxurious but remains budget-friendly.
Materials Needed:
- Existing or new cabinet base
- High-end countertop material (granite, marble, or a good imitation)
- Sink and faucet
- Paint and hardware
Instructions:
- Refinish the Cabinet: Paint or stain the cabinet base in a color that complements your bathroom.
- Install the Countertop: Attach your chosen countertop to the cabinet base, ensuring a secure fit.
- Install the Sink and Faucet: Place the sink and install the faucet according to the manufacturer’s instructions.
- Update Hardware: Replace old knobs or pulls with more luxurious options.
Seasonal Decor: Year-Round DIY Projects for a Festive Home
Decorating your home according to the seasons can refresh your space and make it feel festive all year long. Here are some DIY projects tailored for each season, ensuring your home stays vibrant and seasonally appropriate.
Spring Renewal: DIY Floral Arrangements
Spring is the perfect time to bring the freshness of blooming flowers indoors.
Materials Needed:
- Assorted fresh or silk flowers
- Floral foam (for fresh flowers)
- Vases or decorative containers
- Scissors or floral shears
- Optional: wire, tape
Instructions:
- Prepare the Vase: If using fresh flowers, fit floral foam into the vase and soak it in water. For silk flowers, arrange foam for stability.
- Trim Stems: Cut the stems at an angle to the desired length.
- Arrange Flowers: Start with larger flowers to form a base and add smaller flowers to fill gaps. Use greenery as a filler around the edges.
- Add Finishing Touches: Adjust the arrangement by rotating the vase and tweaking the flowers for a balanced look.
Summer Vibes: Outdoor DIY Projects for Sunny Days
Enhance your outdoor living space to enjoy long summer days.
Materials Needed:
- Wooden pallets
- Outdoor cushions
- Outdoor paint or stain
- Hammer and nails
- Sandpaper
Instructions:
- Build a Pallet Lounge: Sand down wooden pallets and paint or stain them. Stack them to create a base and backrest. Secure the stacked pallets with nails.
- Add Cushions: Place weather-resistant cushions on the seat for comfort.
- Accessorize: Add outdoor rugs, side tables, and string lights to create a cozy ambiance.
Autumn Accents: Handcrafted Fall Decorations
Autumn’s rich colors and natural textures provide the perfect inspiration for home decor.
Materials Needed:
- Leaves, pinecones, acorns
- Paint and brushes
- Wreath base (straw or foam)
- Hot glue gun
- Ribbon or twine
Instructions:
- Create a Fall Wreath: Attach leaves, pinecones, and acorns to the wreath base using a hot glue gun. Arrange them densely for full coverage.
- Add Color: Paint some elements in autumnal colors like gold, orange, or red.
- Hang with Ribbon: Use ribbon or twine to hang the wreath on your door or wall.
Winter Wonderland: Creating Cozy Holiday Decor
Winter decor should evoke warmth and light during the darker days of the year.
Materials Needed:
- White and silver ornaments
- LED string lights
- Artificial snow
- Glass jars or clear vases
- Batteries for lights
Instructions:
- Fill Jars with Ornaments and Lights: Place string lights in glass jars or vases and add silver and white ornaments. Sprinkle artificial snow for a frosty look.
- Arrange Decor: Place the jars around your living space, particularly near windows or on mantels.
- Light Up: Turn on the lights to create a cozy, sparkling effect in the evenings.
Seasonal Wreaths: A DIY Guide for Every Occasion
Wreaths are versatile decorations that can be customized for any season.
Materials Needed:
- Wreath base (foam, straw, or vine)
- Seasonal materials (flowers, leaves, ornaments)
- Floral wire or hot glue
- Decorative ribbon
Instructions:
- Base Preparation: Choose your wreath base according to the season.
- Attach Decorations: Use floral wire or hot glue to attach your chosen decorations securely.
- Add Ribbon: Finish with a decorative ribbon for hanging.
Frequently Asked Questions about the Best DIY Projects for Home Decor in 2024
1- What are some eco-friendly DIY projects for home decor?
Some eco-friendly DIY projects include upcycling old furniture, creating DIY plant holders from recycled materials, making natural dyes from kitchen scraps, and crafting wall art from repurposed wood.
2- How can I upcycle old furniture at home?
You can upcycle old furniture by sanding and painting wooden pieces, reupholstering chairs or sofas with sustainable materials, and creatively repurposing items like turning an old ladder into a bookshelf or a door into a dining table.
3- What materials can be used to create DIY plant holders?
You can use recycled materials like tin cans, jars, discarded PVC pipes, and old tires to create unique and functional DIY plant holders.
4- How can I make natural dyes for home decor projects?
Natural dyes can be made from avocado pits and skins for pink dye, onion skins for orange dye, and turmeric for a bright yellow dye. These natural sources can dye fabrics like curtains, pillowcases, and tablecloths.
5- What are some zero-waste decor tips for home decoration?
Zero waste decor tips include choosing reusable decorations, opting for eco-friendly materials, and prioritizing DIY projects over purchasing new items to reduce environmental impact.
6- How can I create floating shelves for minimalist home decor?
To create floating shelves, you need wooden boards, heavy-duty wall brackets, screws, a drill, and sandpaper. Prepare the wood, install brackets using a level, attach the shelves to the brackets, and finish with paint or wood stain.
7- What are the steps to make a minimalist clock?
To make a minimalist clock, prepare a wooden base, install a clock mechanism, attach contrasting clock hands for visual impact, and mount or place the clock in your desired location.
8- How can I make geometric mirrors for home decor?
To make geometric mirrors, you need mirror tiles, plywood or MDF base, strong adhesive, and optional paint. Design a layout, attach mirrors to the base, and add finishing touches like painting the edges.
9- What are some tips for creating a Scandinavian-style plant stand?
For a Scandinavian-style plant stand, use wooden dowels or legs and a circular or square wooden top. Attach legs at equal distances around the perimeter of the top, secure with screws, and finish with wood glue and paint or stain.
10- How can I utilize vertical space in a small home effectively?
You can utilize vertical space by installing vertical gardens, using wall-mounted shelves, or creating hanging storage solutions to maximize floor space and enhance the functionality of your living area.
References and Links
Here are ten authoritative and relevant sources to enhance your understanding and execution of eco-friendly DIY projects for modern homes:
- Environmental Protection Agency – Sustainable Materials Management
- Green Building Council – Guide to Green Building
- Instructables – Eco-Friendly DIY Projects
- Mother Earth News – DIY Projects for Sustainability
- Planet Ark – Recycling and Upcycling DIY Tips
- Sustainable Jungle – Best Practices for Sustainable Living
- The Spruce – Guide to Eco-Friendly Living
- TreeHugger – How to Make Your Home More Sustainable
- Upcycle That – Creative Upcycling Ideas
- Zero Waste Home – Tips for Reducing Waste